Mushroom Photography: A Beginner's Guide
Why Photograph Mushrooms
Mushroom photography is more than a hobby. It’s a way to learn to see. When you get down to mushroom level and look at the world through its eyes, the forest stops being a backdrop for a walk. It becomes a universe.
And mushroom photography is also citizen science. Every quality observation on iNaturalist adds to the biodiversity database for Portugal. The Cogumelos na Cidade project in Coimbra has already discovered species previously unrecorded in the country.
Equipment
Camera or Smartphone?
Both work. Modern smartphones (iPhone 15/16 Pro, Samsung Galaxy S series) automatically switch to macro mode when you get close to a subject, focusing from 2 cm. For a start, that’s more than enough.
If you want more — you need a camera with interchangeable lenses.
For Camera Users
| What | Why |
|---|---|
| 90–105mm macro lens | Primary tool: 1:1 magnification, comfortable working distance |
| 16–35mm wide-angle | Mushroom in forest context — “ecological portrait” |
| Small tripod (Manfrotto Pixi, Joby GorillaPod) | Sharp shots at slow shutter speeds in dark forest |
| Reflector or white card | Fill shadows under gills without flash |
| LED torch | Soft controllable light from below |
| Polarising filter | Remove glare from wet caps |
For Smartphone Users
- Clip-on macro lens (Xenvo Pro, Apexel) — real macro for €15–40
- Small phone tripod or GorillaPod
- Bluetooth shutter release — shoot without shake
Universal
- Ground mat or pad — you’ll be lying on wet ground
- Spray bottle — water droplets on mushrooms add magic
- Spare batteries — cold forests drain batteries faster
Camera Settings
Aperture (the Key Parameter)
- f/2.8–4 — creamy bokeh, isolate a single mushroom. Artistic portraits
- f/8–11 — the sweet spot: cap and surroundings sharp, background softly blurred
- f/16–22 — everything sharp from foreground to background. For “ecological portraits” on wide angle
Shutter Speed
- On tripod: 1/4–1/30 sec (mushrooms don’t move — use that)
- Handheld: at least 1/125 sec
- Macro handheld: 1/250 or faster — macro magnifies camera shake
ISO
Forest means always low light. A tripod lets you keep ISO at minimum.
- ISO 100–200 — ideal on tripod
- ISO 400–800 — acceptable handheld in dark forest
- ISO 1600 — last resort, noise becomes visible
Always shoot RAW — maximum flexibility in processing.
Smartphone: 5 Rules
- Get down to mushroom level — don’t shoot from above
- Tap the screen to set focus (long tap = lock focus and exposure)
- Use the 2–3 second timer — eliminates shake
- Avoid digital zoom — move closer instead
- Enable ProRAW/RAW if your phone supports it
Composition
“Mushroom’s Eye View” — The Main Secret
Camera at ground level, lens horizontal or slightly upward. You enter the mushroom’s world: you see the gills, backlight through a translucent cap, dewdrops.
This means lying on the ground. Or using a flip-screen camera and a small tripod.
Habitat Context
Wide angle (16–35mm), mushroom in foreground, forest behind. Shows the ecological relationship: which trees it grows with, what substrate, what light. Aperture f/11–16 for front-to-back sharpness.
Details and Textures
Macro: cap texture, gills, dewdrops, scales. Cross-section for scientific documentation — flesh colour, colour change.
Four Rules
- Rule of thirds — mushroom not in the centre, but at intersection points
- Leading lines — roots, branches, lines of moss guide the eye to the mushroom
- Clean the clutter — remove leaves, pine needles around the mushroom (carefully, without damaging the mycelium!)
- Negative space — simple background strengthens focus on the subject
Light
Best Times
- Early morning — fresh mushrooms (undamaged by slugs), soft light, dew
- Golden hour — low autumn sun piercing through branches, backlighting the mushroom. Translucent caps begin to glow
- Overcast day — even light with no harsh shadows. Ideal for macro
- After rain — colours intensify, mushrooms glisten
What to Avoid
Never use the built-in flash — harsh flat light kills the atmosphere. For extra light, use a reflector, LED torch, or even a piece of white card.
Focus Stacking
In macro photography, depth of field is measured in millimetres. Focus stacking solves this: you shoot a series of frames with different focus points and merge them in software.
Process:
- Tripod is essential
- Same ISO, shutter speed, aperture for all frames
- Shift focus manually or use the camera’s built-in function
- Merge in Photoshop (Auto-Blend Layers), Helicon Focus, or Affinity Photo
Photogenic Species of Portugal
| Species | Why It’s Photogenic | Where to Find |
|---|---|---|
| Fly agaric | Iconic: red cap with white spots | Pine forests, north |
| Caesar’s mushroom | Bright orange cap emerging from white volva | Oak forests, Alentejo |
| Chanterelle | Golden-yellow colonies on green moss | Mixed forests, north |
| Porcini | Massive, textured, classic form | Chestnut and oak forests |
| Parasol mushroom | Tall (up to 40 cm), distinctive “umbrella” | Meadows and clearings |
| Silarca | Iberian endemic, emerges from underground | Montado, Alentejo |
| Beefsteak fungus | Looks like raw meat, vivid texture | On oaks and chestnuts |
When and Where to Shoot
Seasonal Calendar
| Period | What to Photograph |
|---|---|
| October–November | Peak diversity: fly agarics, porcini, chanterelles, saffron milk caps |
| December–January | Oyster mushrooms, black trumpets, winter bracket fungi |
| February–April | Silarca, desert truffle, morels |
Ideal Conditions
- 24–48 hours after rain — fresh fruiting bodies, vivid colours
- Early morning — soft light, dew, intact mushrooms
- Overcast day — even lighting for macro
Best Locations
- Serra da Arrábida — Mediterranean maquis, unique species
- Tróia pine forests — slippery jacks and saffron milk caps on sand
- Sintra — wet Atlantic forests, mosses, Mycena
- Montesinho (Trás-os-Montes) — 200+ edible species
Photos for Science: iNaturalist Standards
If your goal is not just beauty but also contributing to science, follow the protocol of at least 3 photos per observation:
Required Angles
- In situ — mushroom in its habitat, with scale (coin, ruler). Show surrounding trees
- Cap from above — colour, texture, scales, sliminess
- Hymenophore from below — gills, tubes, spines, attachment type to the stipe
Additional Angles (improve identification chances)
- Side profile — cap and stipe shape, ring, volva
- Entire stipe (including the base) — the volva may be underground!
- Cross-section — flesh colour, colour change
Text Notes
In your iNaturalist description, note: substrate, smell, nearby trees, solitary or in groups. This is critical for identifying mycorrhizal species.
Common Mistakes
| Mistake | How to Fix |
|---|---|
| Shooting from above | Get down to mushroom level |
| Built-in flash | Reflector, LED, or natural light |
| No tripod in forest | Small tripod, GorillaPod, beanbag |
| Only one shot | Series: top, side, bottom, macro, context |
| Over-saturation in editing | Moderate — especially the red channel |
| Habitat damage | Move carefully, minimal intervention |
Ethics of Mushroom Photography
- Don’t damage the habitat — don’t trample moss, stick to trails. Mycelium below the surface is easily damaged
- Don’t pick mushrooms for photos — photograph in situ. For hymenophore shots, use a mirror or a camera at ground level
- Minimal intervention — removing a leaf is fine; breaking branches and clearing the area is not
- Don’t move the mushroom to a “more beautiful” spot
- Don’t disclose locations of rare species on social media — to prevent trampling
- Follow foraging laws — collecting in Portuguese nature parks may be restricted
Post-Processing
Basic Workflow (Lightroom / alternatives)
- White balance correction (forest light is often greenish)
- Raise Shadows — recover detail in dark areas
- Lower Highlights — wet glossy caps
- Clarity +10–20 for textures
- Vibrance +10–15 (not Saturation — it oversaturates)
- Local adjustments: brighten mushroom, darken background
On Smartphone
- Lightroom Mobile (free) — full toolset
- Snapseed (free) — quick adjustments
Image sources
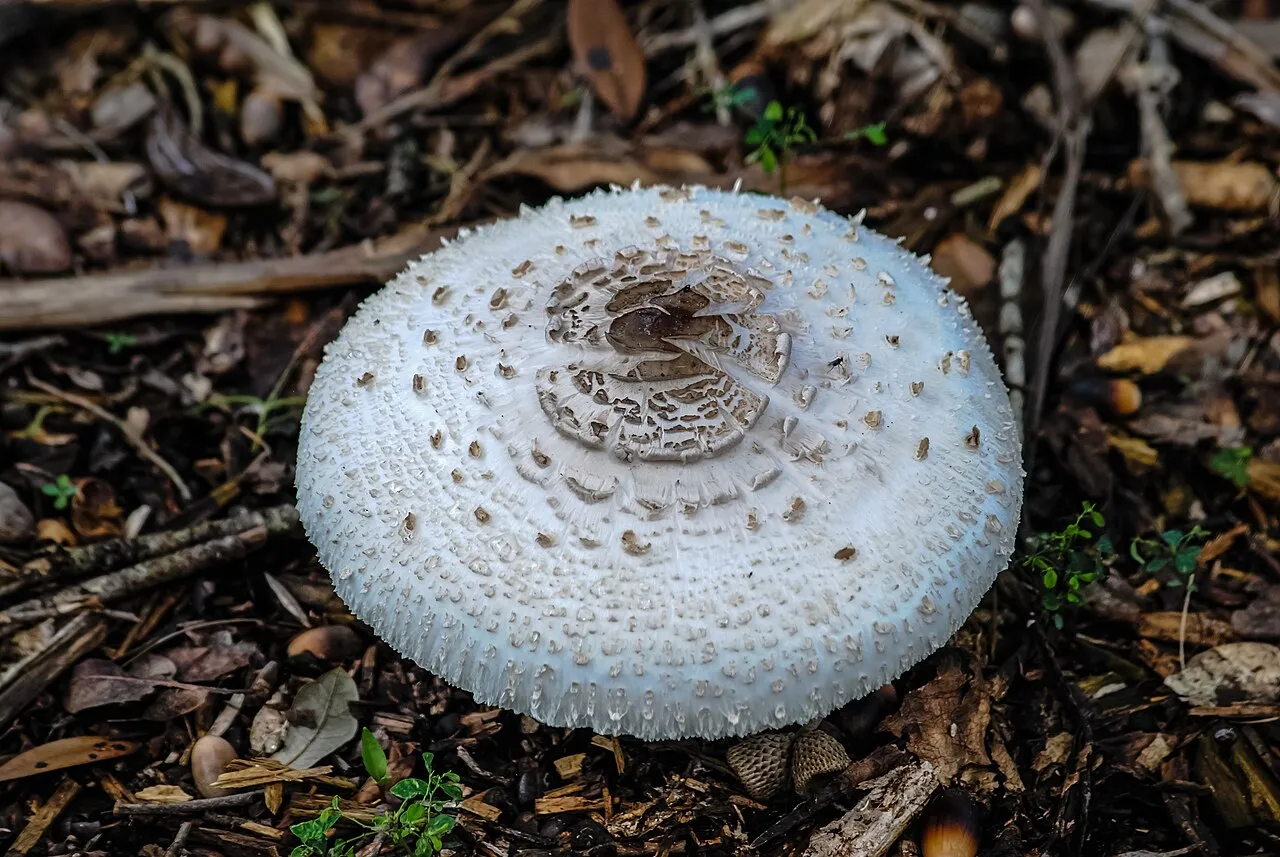
- photo-guide.webp — Mushroom macro photography — close-up of a cap. Author: Shadowmeld Photography. License: CC BY-SA 4.0. Source
Sources
- Photography Roadmap — Mushroom Macro Photography
- PetaPixel — Photographing Mushrooms in Their Natural World
- Nature TTL — How to Photograph Mushrooms
- iNaturalist — Mushroom Identification & Photography
- iNaturalist — How to Observe Mushrooms Methodically
- Albert Dros — Mushrooms in Their Natural World
- Digital Camera World — Flash on Fungi in the Forest
If this article was useful — help us write the next one.
☕ Support on Ko-fi